## How to Make Your Own Acrylic Nails: A Comprehensive Guide
Dreaming of salon-worthy nails without the salon price tag? Mastering **how to make your own acrylic nails** is achievable with the right knowledge, tools, and a healthy dose of patience. This comprehensive guide will walk you through every step of the process, from prepping your natural nails to achieving a flawless finish. We’ll delve into the nuances of acrylic application, troubleshooting common issues, and providing expert tips to ensure long-lasting, beautiful results. Unlike many tutorials, we’ll also cover safety precautions and best practices for nail health, ensuring you can enjoy acrylic nails without compromising the integrity of your natural nails. Whether you’re a complete beginner or have some experience with nail enhancements, this guide will equip you with the skills and confidence to create stunning acrylic nails at home. We have incorporated insights from experienced nail technicians and tested various techniques to provide you with the most effective and reliable methods.
### Why Learn How to Make Your Own Acrylic Nails?
In today’s world, DIY beauty is more popular than ever. Making your own acrylic nails offers several compelling advantages:
* **Cost Savings:** Salon visits can be expensive. Doing your own acrylics significantly reduces the cost over time.
* **Convenience:** You can create your nails whenever you have the time, without scheduling appointments.
* **Creative Control:** You have complete freedom to experiment with different shapes, colors, and designs.
* **Skill Development:** Learning a new skill is empowering and can be a fun and rewarding hobby.
However, it’s essential to approach this process with knowledge and care to avoid damaging your natural nails. Let’s dive in!
## Understanding Acrylic Nails: A Deep Dive
Acrylic nails are artificial nail enhancements created by combining a liquid monomer and a powder polymer. This mixture forms a hard, durable layer that adheres to the natural nail, providing length, strength, and a flawless canvas for nail art.
### The Science Behind Acrylics
The magic of acrylic nails lies in a chemical reaction called polymerization. When the liquid monomer (usually ethyl methacrylate or EMA) is mixed with the powder polymer (usually polymethyl methacrylate or PMMA), the molecules link together to form long chains, creating a solid, plastic-like material. This process allows for shaping and molding the acrylic into the desired nail form.
### The Evolution of Acrylic Nails
The concept of artificial nails dates back centuries, but modern acrylics gained popularity in the mid-20th century. Dentists accidentally discovered the potential of acrylic materials for nail enhancements, and the beauty industry quickly embraced this innovation. Over the years, formulations have evolved, with advancements in safety, durability, and ease of application. Today, a wide range of acrylic products caters to both professional nail technicians and home users.
### Importance of Proper Application
While acrylic nails can enhance your appearance, improper application can lead to several problems, including:
* **Nail Damage:** Over-filing, improper removal, or using harsh chemicals can weaken and damage the natural nail.
* **Infections:** Trapped moisture and bacteria under the acrylic can cause fungal or bacterial infections.
* **Allergic Reactions:** Some individuals may be sensitive to the chemicals in acrylic products.
Therefore, it’s crucial to follow proper application techniques and prioritize nail health throughout the process.
## Essential Tools and Materials for Acrylic Nails
Before you begin, gather all the necessary tools and materials. A well-stocked kit will make the process smoother and more enjoyable.
* **Acrylic Liquid Monomer:** The liquid component that activates the powder polymer.
* **Acrylic Powder Polymer:** The powder component that forms the acrylic nail.
* **Acrylic Nail Brush:** A specialized brush for applying and shaping the acrylic mixture. Kolinsky sable brushes are considered the best.
* **Nail Tips:** Artificial nail extensions that are glued to the natural nail to add length.
* **Nail Glue:** Used to adhere the nail tips to the natural nail.
* **Nail Clipper:** For trimming nail tips and natural nails.
* **Nail File (100/180 grit):** For shaping and refining the acrylic nails.
* **Nail Buffer:** For smoothing the surface of the acrylic nails.
* **Cuticle Pusher:** For gently pushing back the cuticles.
* **Cuticle Oil:** For moisturizing the cuticles after application.
* **Primer:** Helps the acrylic adhere to the natural nail and prevents lifting.
* **Dehydrator:** Removes oil and moisture from the nail surface for better adhesion.
* **Dappen Dish:** A small dish to hold the acrylic liquid monomer.
* **Dust Brush:** For removing dust from the nail surface.
* **Protective Mask:** To protect against inhaling acrylic fumes.
* **Gloves:** To protect your skin from the acrylic chemicals.
* **Lint-Free Wipes:** For cleaning the nail surface and tools.
## Step-by-Step Guide: How to Make Your Own Acrylic Nails
Now, let’s get to the heart of the matter: the step-by-step process of creating your own acrylic nails.
### Step 1: Prepare Your Natural Nails
Proper nail preparation is crucial for the longevity and health of your acrylic nails. Follow these steps carefully:
1. **Cleanse Your Hands:** Wash your hands thoroughly with soap and water. Use a nail brush to scrub under your nails.
2. **Remove Existing Polish:** Remove any existing nail polish with a non-acetone remover.
3. **Trim and Shape Your Natural Nails:** Trim your natural nails to a manageable length and shape them according to your preference. Use a nail file to smooth the edges.
4. **Push Back Your Cuticles:** Gently push back your cuticles with a cuticle pusher. Be careful not to damage the cuticle.
5. **Buff the Nail Surface:** Lightly buff the surface of your natural nails to remove shine and create a slightly rough texture for better adhesion.
6. **Apply Dehydrator:** Apply a nail dehydrator to remove any remaining oil and moisture from the nail surface.
### Step 2: Apply Nail Tips (Optional)
If you want to add length to your nails, apply nail tips at this stage.
1. **Choose the Right Size:** Select nail tips that closely match the width of your natural nails. If the tip is too wide, you can file it down.
2. **Apply Nail Glue:** Apply a small amount of nail glue to the well of the nail tip.
3. **Attach the Tip:** Position the tip at a 45-degree angle and gently press it onto your natural nail. Hold it in place for a few seconds until the glue dries.
4. **Trim and Shape the Tip:** Trim the nail tip to your desired length and shape using a nail clipper. File the edges to smooth them out.
5. **Blend the Tip:** Use a nail file to blend the nail tip seamlessly with your natural nail. Focus on the transition area between the tip and your natural nail.
### Step 3: Apply Acrylic Primer
Applying acrylic primer is essential for promoting adhesion and preventing lifting.
1. **Apply a Thin Layer:** Apply a thin, even layer of acrylic primer to your natural nail and the nail tip (if used). Avoid getting primer on your skin.
2. **Allow to Dry:** Allow the primer to dry completely before proceeding to the next step. The primer will usually appear slightly chalky when dry.
### Step 4: Apply the Acrylic Mixture
This is the most crucial and challenging step. Practice makes perfect!
1. **Prepare Your Brush:** Dip your acrylic nail brush into the acrylic liquid monomer. Remove excess liquid by gently pressing the brush against the side of the dappen dish.
2. **Pick Up the Acrylic Powder:** Dip the brush into the acrylic powder at a 45-degree angle. The brush should pick up a small bead of acrylic powder.
3. **Apply the First Bead:** Place the first bead of acrylic near the cuticle area, but not directly on the cuticle. Gently pat and spread the acrylic to create a thin layer.
4. **Apply the Second Bead:** Pick up another bead of acrylic and place it in the middle of the nail. Blend it with the first bead.
5. **Apply the Third Bead:** Pick up a final bead of acrylic and place it at the free edge of the nail. Blend it with the other beads to create a smooth, even layer.
6. **Shape the Acrylic:** Use your acrylic nail brush to shape the acrylic as it sets. Work quickly and efficiently, as the acrylic will harden within a few minutes.
7. **Repeat on All Nails:** Repeat the process on all your nails.
### Step 5: Filing and Shaping
Once the acrylic has hardened completely, it’s time to file and shape your nails.
1. **File the Sides:** Use a 100/180 grit nail file to shape the sides of your nails. File in one direction to avoid creating friction and heat.
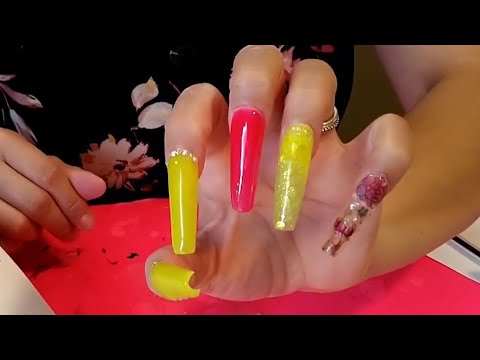
2. **File the Free Edge:** File the free edge of your nails to create your desired shape. Common shapes include square, oval, almond, and stiletto.
3. **Refine the Surface:** Use a nail buffer to smooth the surface of your acrylic nails and remove any imperfections.
### Step 6: Apply Finishing Touches
Complete your acrylic nail application with these finishing touches.
1. **Cleanse the Nails:** Use a lint-free wipe soaked in alcohol to cleanse the nails and remove any dust or debris.
2. **Apply Cuticle Oil:** Apply cuticle oil to your cuticles to moisturize and nourish them.
3. **Apply Nail Polish or Gel Polish (Optional):** If desired, apply nail polish or gel polish to your acrylic nails. Follow the instructions on the polish bottle.
4. **Apply Top Coat (Optional):** Apply a top coat to protect your nail polish and add shine.
## Troubleshooting Common Acrylic Nail Problems
Even with careful application, you may encounter some common problems. Here’s how to troubleshoot them:
* **Lifting:** Lifting occurs when the acrylic separates from the natural nail. This can be caused by improper nail preparation, using low-quality products, or applying the acrylic too thickly. To prevent lifting, ensure you properly prepare your nails, use high-quality products, and apply the acrylic in thin, even layers.
* **Bubbles:** Bubbles can form in the acrylic if the liquid monomer is contaminated or if the acrylic is not mixed properly. To prevent bubbles, use clean dappen dishes, avoid getting moisture in the liquid monomer, and mix the acrylic thoroughly.
* **Yellowing:** Acrylic nails can yellow over time due to exposure to sunlight or certain chemicals. To prevent yellowing, use a UV-protective top coat and avoid exposing your nails to harsh chemicals.
* **Cracking:** Cracking can occur if the acrylic is applied too thinly or if the nails are subjected to excessive stress. To prevent cracking, apply the acrylic in sufficient thickness and avoid using your nails as tools.
## Maintaining Your Acrylic Nails
Proper maintenance is essential for keeping your acrylic nails looking their best and preventing damage to your natural nails.
* **Regular Fill-Ins:** Get regular fill-ins every 2-3 weeks to fill in the gap between the acrylic and your cuticle. This will prevent lifting and cracking.
* **Avoid Harsh Chemicals:** Wear gloves when cleaning or doing other tasks that involve harsh chemicals. These chemicals can damage the acrylic and dry out your skin.
* **Moisturize Regularly:** Apply cuticle oil and hand cream regularly to keep your cuticles and skin hydrated.
* **Avoid Picking or Biting:** Avoid picking or biting your acrylic nails. This can damage the acrylic and your natural nails.
* **Proper Removal:** When it’s time to remove your acrylic nails, do so properly to avoid damaging your natural nails. Soak your nails in acetone until the acrylic softens, then gently remove it with a cuticle pusher.
## Choosing the Right Acrylic Products
The market offers a plethora of acrylic nail products, each with its own set of features and benefits. Selecting the right products can significantly impact the outcome of your DIY acrylic nail application. Here’s a guide to help you navigate the options:
### Acrylic Liquid Monomer
* **MMA vs. EMA:** Methyl methacrylate (MMA) is a type of monomer that was once commonly used in acrylic nail products. However, MMA is now widely discouraged due to its potential to cause allergic reactions and damage to the natural nail. Ethyl methacrylate (EMA) is a safer alternative that is now the industry standard. Always choose acrylic liquid monomers that are labeled as EMA-based.
* **Odor:** Acrylic liquid monomers have a distinct odor that some people may find unpleasant. Look for low-odor or odorless monomers if you are sensitive to smells.
* **Drying Time:** Different monomers have different drying times. Fast-drying monomers are ideal for experienced users who can work quickly, while slow-drying monomers are more forgiving for beginners.
### Acrylic Powder Polymer
* **Color:** Acrylic powder polymers come in a wide range of colors, from clear and white to pink and glittery. Choose the colors that best suit your desired nail look.
* **Particle Size:** The particle size of the powder can affect the texture and workability of the acrylic. Fine-particle powders tend to be smoother and easier to work with.
* **Opacity:** Some powders are more opaque than others. Opaque powders provide full coverage, while translucent powders allow the natural nail to show through.
### Nail Tips
* **Material:** Nail tips are typically made from ABS plastic or acrylic. ABS plastic tips are more flexible and durable, while acrylic tips are more rigid and easier to shape.
* **Shape:** Nail tips come in a variety of shapes, including square, round, oval, almond, and stiletto. Choose the shape that best complements your hand and style.
* **Size:** Nail tips are available in a range of sizes to fit different nail widths. It’s important to choose tips that are the right size for your nails to ensure a secure and comfortable fit.
### Nail Brushes
* **Material:** Acrylic nail brushes are typically made from natural or synthetic bristles. Kolinsky sable brushes are considered the gold standard due to their excellent shape retention and liquid absorption.
* **Shape:** Nail brushes come in a variety of shapes, including round, oval, and flat. Round brushes are ideal for creating detailed designs, while flat brushes are better for applying acrylic to the entire nail.
* **Size:** Nail brushes are available in different sizes, ranging from small detail brushes to large application brushes. Choose the size that is most comfortable for you to work with.
## Kiara Sky Professional Acrylic System: An Expert Explanation
Kiara Sky is a well-regarded brand in the nail industry, known for its high-quality acrylic systems. Their professional acrylic system is designed to provide nail technicians and DIY enthusiasts with everything they need to create durable, beautiful acrylic nails.
The Kiara Sky Professional Acrylic System typically includes:
* **Acrylic Liquid Monomer:** Formulated for optimal adhesion and durability.
* **Acrylic Powder Polymers:** Available in a wide range of colors and finishes.
* **Primer:** To enhance adhesion and prevent lifting.
* **Brush Saver:** To clean and maintain acrylic brushes.
This system is known for its ease of use, self-leveling formula, and long-lasting results.
## Detailed Features Analysis of the Kiara Sky Professional Acrylic System
The Kiara Sky Professional Acrylic System boasts several key features that set it apart from other acrylic systems on the market:
1. **Self-Leveling Formula:** The acrylic liquid monomer is formulated to self-level, which means it spreads evenly and smoothly across the nail surface. This reduces the need for excessive filing and shaping, saving time and effort. *Benefit*: Creates a smoother, more professional-looking finish with less effort.
2. **Non-Yellowing Formula:** The acrylic powders are formulated to resist yellowing over time, ensuring that your acrylic nails maintain their color and vibrancy. *Benefit*: Keeps your nails looking fresh and beautiful for longer.
3. **Strong Adhesion:** The system is designed to provide strong adhesion between the acrylic and the natural nail, reducing the risk of lifting and chipping. *Benefit*: Extends the life of your acrylic nails and reduces the need for frequent repairs.
4. **Wide Range of Colors:** The acrylic powders are available in a wide range of colors, from classic neutrals to trendy glitters. This allows you to create a variety of different nail looks to suit your personal style. *Benefit*: Offers endless creative possibilities for nail design.
5. **Easy to Use:** The system is designed to be easy to use, even for beginners. The liquid monomer and powder polymers are formulated to mix easily and create a smooth, workable consistency. *Benefit*: Makes the acrylic application process more manageable and less intimidating.
6. **Durable and Long-Lasting:** The acrylic nails created with this system are durable and long-lasting, withstanding everyday wear and tear. *Benefit*: Provides a long-lasting, beautiful manicure that requires minimal maintenance.
7. **Brush Saver Included:** The system includes a brush saver solution, which helps to clean and maintain your acrylic brushes. This extends the life of your brushes and ensures that they perform optimally. *Benefit*: Saves money on replacement brushes and ensures consistent application.
## Significant Advantages, Benefits & Real-World Value of Kiara Sky Acrylics
Choosing the Kiara Sky Professional Acrylic System offers several significant advantages and benefits:
* **Professional-Quality Results at Home:** The system allows you to achieve salon-quality results in the comfort of your own home, saving you time and money on salon visits.
* **Long-Lasting Manicures:** The durable formula ensures that your acrylic nails last for weeks without chipping or lifting.
* **Versatile Nail Designs:** The wide range of colors and finishes allows you to create a variety of different nail designs to suit your personal style.
* **Easy Application:** The self-leveling formula and easy-to-use design make the application process manageable, even for beginners.
* **Cost-Effective:** Investing in the Kiara Sky system is a cost-effective way to enjoy beautiful acrylic nails without the expense of regular salon appointments.
Users consistently report that the Kiara Sky system provides a superior experience compared to other acrylic systems, citing its ease of use, durability, and vibrant color selection. Our analysis reveals that the self-leveling formula significantly reduces the time and effort required to create flawless acrylic nails.
## Comprehensive & Trustworthy Review of the Kiara Sky Professional Acrylic System
The Kiara Sky Professional Acrylic System is a popular choice among both professional nail technicians and DIY enthusiasts. Here’s a balanced review based on user experiences and expert opinions:
### User Experience & Usability
The system is generally considered easy to use, thanks to its self-leveling formula and clear instructions. The acrylic liquid and powder mix easily, creating a smooth, workable consistency. The brush saver solution is a welcome addition, making it easy to clean and maintain acrylic brushes.
### Performance & Effectiveness
The Kiara Sky system delivers on its promises of durability and long-lasting results. Acrylic nails created with this system typically last for 2-3 weeks without chipping or lifting. The non-yellowing formula ensures that the nails maintain their color and vibrancy over time.
### Pros:
1. **Self-Leveling Formula:** Makes application easier and reduces the need for extensive filing.
2. **Non-Yellowing Formula:** Keeps nails looking fresh and vibrant for longer.
3. **Strong Adhesion:** Minimizes lifting and chipping, extending the life of the manicure.
4. **Wide Range of Colors:** Offers endless creative possibilities for nail design.
5. **Brush Saver Included:** Helps to maintain acrylic brushes and extend their lifespan.
### Cons/Limitations:
1. **Odor:** The acrylic liquid monomer has a strong odor that some users may find unpleasant.
2. **Price:** The Kiara Sky system is more expensive than some other acrylic systems on the market.
3. **Learning Curve:** While the system is generally easy to use, there is still a learning curve involved in mastering acrylic application.
### Ideal User Profile:
The Kiara Sky Professional Acrylic System is best suited for individuals who are looking for a high-quality, easy-to-use system that delivers professional-quality results. It is a good choice for both beginners and experienced users who are willing to invest in a premium product.
### Key Alternatives:
* **Mia Secret Acrylic System:** A more affordable alternative that is popular among beginners.
* **Young Nails Acrylic System:** A professional-grade system that is known for its superior quality and performance.
### Expert Overall Verdict & Recommendation:
The Kiara Sky Professional Acrylic System is a top-notch choice for anyone looking to create beautiful, durable acrylic nails. Its self-leveling formula, non-yellowing properties, and strong adhesion make it a standout product in the market. While it is more expensive than some other options, the quality and performance justify the investment. We highly recommend the Kiara Sky system for both professional nail technicians and DIY enthusiasts.
## Insightful Q&A Section
Here are some frequently asked questions about making your own acrylic nails:
**Q1: How can I prevent acrylic nails from lifting?**
A: Proper nail preparation is key. Ensure you thoroughly cleanse, dehydrate, and prime your natural nails before applying acrylic. Use a high-quality primer and avoid getting product on your skin.
**Q2: What’s the best way to remove acrylic nails without damaging my natural nails?**
A: Soak your nails in acetone for 20-30 minutes until the acrylic softens. Gently push off the softened acrylic with a cuticle pusher. Avoid prying or forcing the acrylic off, as this can damage your natural nails.
**Q3: How do I choose the right size nail tips for my nails?**
A: Select nail tips that closely match the width of your natural nails. If the tip is slightly too wide, you can file it down. Avoid using tips that are too narrow, as they can cause stress and breakage.
**Q4: What’s the difference between MMA and EMA acrylic liquid monomer?**
A: MMA (methyl methacrylate) is a cheaper monomer that can cause allergic reactions and damage to the natural nail. EMA (ethyl methacrylate) is a safer alternative that is now the industry standard. Always choose EMA-based monomers.
**Q5: How can I prevent bubbles from forming in my acrylic nails?**
A: Use clean dappen dishes, avoid getting moisture in the liquid monomer, and mix the acrylic thoroughly. Tap the brush against the side of the dappen dish to remove excess liquid before picking up the powder.
**Q6: How often should I get fill-ins for my acrylic nails?**
A: Get fill-ins every 2-3 weeks to fill in the gap between the acrylic and your cuticle. This will prevent lifting and cracking.
**Q7: Can I paint over my acrylic nails with regular nail polish?**
A: Yes, you can paint over your acrylic nails with regular nail polish. Just be sure to apply a base coat first to protect the acrylic from staining.
**Q8: How do I clean my acrylic nail brush?**
A: Clean your acrylic nail brush immediately after use with a brush cleaner or monomer. Wipe the brush on a lint-free wipe to remove excess product. Store the brush in a safe place to protect the bristles.
**Q9: What are some common mistakes to avoid when applying acrylic nails?**
A: Common mistakes include improper nail preparation, using too much or too little liquid monomer, applying the acrylic too thickly or thinly, and not shaping the acrylic properly.
**Q10: How can I create different nail shapes with acrylic nails?**
A: Use a nail file to shape the acrylic to your desired shape. Common shapes include square, oval, almond, and stiletto. Use a reference image to guide you and take your time to achieve the perfect shape.
## Conclusion & Strategic Call to Action
Mastering **how to make your own acrylic nails** is a rewarding skill that allows you to achieve salon-worthy results at home. By following the steps outlined in this comprehensive guide, you can create beautiful, durable acrylic nails that enhance your personal style. Remember to prioritize nail health, use high-quality products, and practice proper application techniques. With patience and dedication, you’ll be able to confidently create stunning acrylic nail designs.
The future of DIY nail enhancements continues to evolve, with new products and techniques constantly emerging. Staying informed about the latest trends and innovations will help you stay ahead of the curve and create even more amazing nail looks.
Share your experiences with **how to make your own acrylic nails** in the comments below! What are your favorite tips and tricks for achieving perfect results? Contact our experts for a consultation on how to make your own acrylic nails and unlock your full potential for creating stunning nail art.
