How to Fix a Broken Acrylic Nail at Home: Your Complete DIY Guide
Nothing’s worse than a perfectly manicured acrylic nail suddenly snapping, cracking, or completely breaking. It’s frustrating, unsightly, and can even be painful. But before you rush to the salon for an expensive repair, know that you can often salvage your acrylic nails right at home. This comprehensive guide will walk you through everything you need to know about how to fix a broken acrylic nail at home, from identifying the type of break to mastering the repair process. We’ll cover the tools, techniques, and essential tips to restore your nails to their former glory, saving you time, money, and a trip to the salon. We aim to provide the most in-depth, trustworthy, and practical advice available, drawing upon expert knowledge and real-world scenarios to ensure you achieve professional-looking results. Whether you’re a seasoned acrylic enthusiast or new to the world of artificial nails, this guide will equip you with the skills and confidence to handle any acrylic nail emergency.
Understanding Acrylic Nail Breaks: Identifying the Damage
Before you can effectively fix a broken acrylic nail at home, it’s crucial to assess the type and severity of the damage. Different types of breaks require different approaches. Understanding the nature of the break will help you choose the right repair method and ensure a long-lasting result.
Types of Acrylic Nail Breaks
- Hairline Crack: A small, thin crack that runs along the surface of the acrylic. This is the easiest type of break to fix.
- Clean Break: The acrylic nail has completely separated into two pieces. This requires reattaching the broken piece.
- Stress Fracture: A crack that forms at the stress point of the nail, usually near the free edge or sidewall. These can be more prone to recurring breaks.
- Lifting: The acrylic is separating from the natural nail bed. This can weaken the entire nail structure and lead to breaks.
- Chip: A small piece of acrylic has broken off, leaving a jagged edge.
Assessing the Severity of the Break
Consider the following factors when assessing the severity of the break:
- Location of the break: Breaks closer to the cuticle are generally more difficult to repair.
- Size of the break: Larger breaks require more extensive repair.
- Damage to the natural nail: Check for any damage to the natural nail bed, such as bleeding, bruising, or separation. If the natural nail is significantly damaged, consult a professional.
Essential Tools and Materials for Acrylic Nail Repair
Having the right tools and materials on hand is essential for a successful acrylic nail repair. Here’s a comprehensive list of what you’ll need:
- Acrylic Nail Glue: Specifically designed for bonding acrylic nails. Look for a strong, fast-drying formula.
- Acrylic Powder: Used to fill in gaps, reinforce the repair, and create a smooth surface. Choose a color that matches your existing acrylic nails.
- Acrylic Liquid Monomer: Activates the acrylic powder and creates a workable paste.
- Dappen Dish: A small glass or ceramic dish to hold the acrylic liquid monomer.
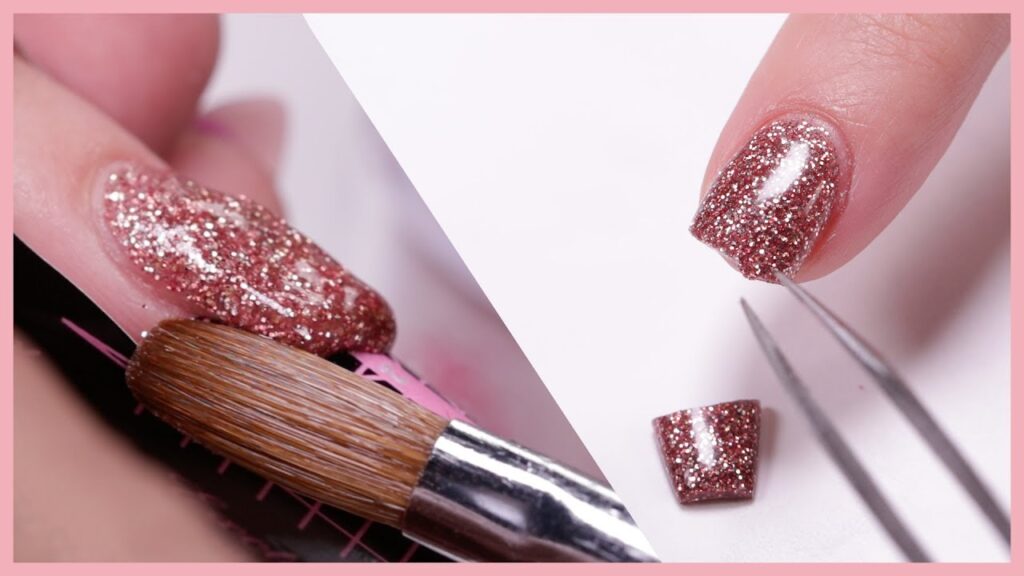
- Acrylic Brush: Used to apply the acrylic mixture to the nail. A size 6 or 8 brush is generally recommended.
- Nail File: A coarse-grit file (100/180) to shape and smooth the acrylic.
- Buffer: A fine-grit buffer to smooth the surface of the nail and remove scratches.
- Nail Clippers: To trim any excess acrylic or ragged edges.
- Cuticle Pusher: To gently push back the cuticles and prepare the nail bed.
- Lint-Free Wipes: To clean the nail surface and remove debris.
- Acetone: To remove any existing polish or debris from the nail.
- Primer: To dehydrate the nail and improve adhesion of the acrylic.
- Top Coat: To seal the repair and add shine.
Step-by-Step Guide: How to Fix Different Types of Acrylic Nail Breaks at Home
Now, let’s dive into the specific repair techniques for different types of acrylic nail breaks. Remember to work in a well-ventilated area and take your time to ensure a clean and professional-looking result.
Fixing a Hairline Crack
- Clean the Nail: Gently clean the nail with acetone to remove any polish or debris.
- Apply Acrylic Glue: Apply a thin line of acrylic glue along the crack.
- Press and Hold: Press the crack together gently and hold for 30-60 seconds until the glue dries.
- File and Buff: File the surface of the nail to smooth out any unevenness. Then, buff the nail to create a smooth finish.
- Apply Top Coat: Apply a top coat to seal the repair and add shine.
Fixing a Clean Break
- Clean the Nail: Clean both pieces of the broken nail with acetone.
- Apply Acrylic Glue: Apply a generous amount of acrylic glue to the broken edges.
- Reattach the Piece: Carefully align the broken piece with the rest of the nail and press firmly. Hold for several minutes until the glue is completely dry.
- Apply Acrylic Powder: Dip an acrylic brush into the monomer and then into the acrylic powder. Create a small bead of acrylic and apply it along the seam of the break to reinforce the repair.
- File and Shape: Once the acrylic is dry, file and shape the nail to create a smooth and even surface.
- Buff and Finish: Buff the nail to remove any scratches and apply a top coat.
Fixing a Stress Fracture
- Clean the Nail: Clean the nail with acetone.
- Apply Acrylic Glue: Apply acrylic glue along the fracture line.
- Reinforce with Acrylic: Apply a small bead of acrylic to the fracture area, blending it smoothly with the existing acrylic.
- File and Shape: File and shape the nail to restore its original form.
- Buff and Finish: Buff the nail and apply a top coat.
Repairing Lifting Acrylic
- Gently Lift the Acrylic: Carefully lift the detached portion of the acrylic nail, avoiding further damage to the natural nail.
- Clean the Nail: Thoroughly clean both the natural nail and the underside of the acrylic with acetone.
- Apply Primer: Apply a thin layer of nail primer to the natural nail to dehydrate it and promote adhesion.
- Apply Acrylic Glue: Apply acrylic glue to the underside of the lifted acrylic.
- Reattach and Press: Carefully reattach the acrylic to the natural nail and press firmly for several minutes.
- Fill Gaps with Acrylic: If there are any gaps, fill them with a small amount of acrylic powder and monomer.
- File, Buff, and Finish: File, buff, and apply a top coat to complete the repair.
Fixing a Chipped Acrylic Nail
- Trim the Chip: Use nail clippers to carefully trim any jagged edges or loose pieces of acrylic.
- Clean the Nail: Clean the nail with acetone.
- Apply Acrylic: Apply a small bead of acrylic to the chipped area, blending it seamlessly with the existing acrylic.
- File and Shape: File and shape the nail to create a smooth and even surface.
- Buff and Finish: Buff the nail and apply a top coat.
Advanced Techniques for Acrylic Nail Repair: Achieving Professional Results
Once you’ve mastered the basic repair techniques, you can explore some advanced methods to achieve even more professional-looking results.
Using a Silk Wrap for Reinforcement
A silk wrap can be used to reinforce a cracked or weakened acrylic nail. Cut a small piece of silk wrap to cover the crack, apply a thin layer of acrylic glue, and press the silk wrap onto the nail. Allow it to dry completely, then file and buff the surface smooth. This technique adds extra strength and prevents the crack from spreading.
Creating a Natural-Looking Apex
The apex is the highest point of the acrylic nail, which provides strength and support. When repairing a broken acrylic nail, pay attention to the apex to ensure it’s properly shaped. Use a small amount of acrylic to build up the apex, creating a smooth, natural curve.
Color Matching Acrylic Powder
If you can’t find an exact match for your acrylic powder, you can mix different colors to create a custom blend. Experiment with small amounts of different powders until you achieve the desired shade. This will ensure that the repair is virtually invisible.
Preventing Acrylic Nail Breaks: Proactive Care and Maintenance
Prevention is always better than cure. Here are some tips to help prevent acrylic nail breaks and keep your nails looking their best:
- Keep Your Nails Short: Longer nails are more prone to breakage. Keeping your nails at a manageable length will reduce the risk of damage.
- Wear Gloves: Protect your nails from harsh chemicals and physical stress by wearing gloves when doing housework, gardening, or other activities that could damage your nails.
- Moisturize Regularly: Keep your nails and cuticles hydrated by applying cuticle oil or lotion daily. This will help prevent the acrylic from drying out and becoming brittle.
- Avoid Using Your Nails as Tools: Don’t use your nails to open cans, scratch surfaces, or perform other tasks that could damage them.
- Get Regular Fills: As your natural nails grow, the acrylic will start to lift. Get regular fills every 2-3 weeks to maintain the integrity of your acrylic nails.
- Choose a Reputable Salon: Ensure that your acrylic nails are applied by a qualified technician who uses high-quality products and follows proper techniques. Improper application can weaken the nails and make them more prone to breakage.
Product Recommendations for At-Home Acrylic Nail Repair
When it comes to repairing acrylic nails at home, the quality of your products can make a significant difference. Here are a few product recommendations based on expert consensus and user reviews:
- Acrylic Nail Glue: Nailene Ultra Quick Nail Glue is a popular choice known for its strong hold and fast drying time.
- Acrylic Powder: Mia Secret Acrylic Powder offers a wide range of colors and is known for its smooth application and durability.
- Acrylic Liquid Monomer: Young Nails Monomer is a professional-grade monomer that provides excellent adhesion and prevents lifting.
- Acrylic Brush: Kolinsky Sable Acrylic Brush are known for their quality and precision, allowing for smooth and controlled application of acrylic.
Advantages of Fixing Your Broken Acrylic Nail at Home
- Cost-Effective: Repairing your nails at home is significantly cheaper than going to a salon.
- Convenience: You can fix your nails whenever and wherever you need to, without having to schedule an appointment.
- Control: You have complete control over the repair process and can customize it to your specific needs.
- Skill Development: Learning how to fix your own acrylic nails can be a valuable skill that saves you time and money in the long run.
- Immediate Solution: You can address the issue immediately, preventing further damage or discomfort.
Potential Drawbacks of DIY Acrylic Nail Repair
- Learning Curve: It takes time and practice to master the techniques of acrylic nail repair.
- Product Costs: Initially, purchasing all the necessary tools and materials can be an investment.
- Potential for Mistakes: If you’re not careful, you could damage your natural nails or create an uneven repair.
- Time Commitment: Repairing acrylic nails can be time-consuming, especially when starting out.
- Quality of Repair: The results may not be as perfect as a professional salon repair, especially for complex breaks.
Who is At-Home Acrylic Repair Best Suited For?
DIY acrylic nail repair is ideal for individuals who:
- Are comfortable with DIY projects and have a steady hand.
- Want to save money on salon visits.
- Have minor breaks or chips that can be easily repaired.
- Are willing to invest time in learning the necessary skills.
- Prefer the convenience of repairing their nails at home.
Key Alternatives to At-Home Acrylic Nail Repair
While DIY repair is a great option, there are alternatives to consider:
- Professional Salon Repair: A salon technician can provide a high-quality repair, especially for complex breaks.
- Removing Acrylics: If the damage is extensive, removing the acrylics and starting fresh may be the best option to protect your natural nails.
Expert Overall Verdict & Recommendation
Overall, learning how to fix a broken acrylic nail at home is a valuable skill that can save you time and money. While it requires some practice and patience, the convenience and cost-effectiveness make it a worthwhile endeavor. For minor breaks, chips, or lifting, DIY repair is an excellent solution. However, for significant damage or if you’re uncomfortable with the process, seeking professional assistance is recommended. Remember to prioritize the health of your natural nails and always use high-quality products.
Q&A: Your Burning Questions About Fixing Broken Acrylic Nails at Home Answered
Here are some frequently asked questions about fixing broken acrylic nails at home, along with expert answers to help you navigate the process:
-
Q: How long will a DIY acrylic nail repair typically last?
A: A well-executed DIY repair can last anywhere from a few days to a couple of weeks, depending on the severity of the break, the quality of the repair, and how well you care for your nails. Regular maintenance and avoiding excessive stress on the nails will help extend the lifespan of the repair.
-
Q: Can I use regular glue instead of acrylic nail glue?
A: No, regular glue is not suitable for repairing acrylic nails. It’s not strong enough to hold the acrylic together and can damage your natural nails. Always use acrylic nail glue specifically designed for bonding acrylics.
-
Q: How do I prevent air bubbles from forming when applying acrylic?
A: To prevent air bubbles, make sure your brush is fully saturated with monomer and that you’re applying the acrylic in thin, even layers. Avoid pressing too hard on the brush, as this can trap air bubbles. If you do see air bubbles, gently smooth them out with the tip of your brush before the acrylic sets.
-
Q: What should I do if I accidentally get acrylic on my skin?
A: If you get acrylic on your skin, immediately wipe it off with a lint-free wipe soaked in acetone. Avoid letting the acrylic dry on your skin, as it can be difficult to remove and may cause irritation.
-
Q: How can I make my acrylic repair look more natural?
A: To create a natural-looking repair, pay attention to the shape and thickness of the acrylic. Blend the repair seamlessly with the existing acrylic and file and buff the surface smooth. Use a color of acrylic powder that closely matches your existing acrylic nails.
-
Q: Is it safe to use a nail drill for at-home acrylic repair?
A: Nail drills can be useful for shaping and smoothing acrylic nails, but they should be used with caution. If you’re not experienced with using a nail drill, it’s best to avoid using one for at-home repair, as you could accidentally damage your natural nails.
-
Q: How do I remove acrylic nails without damaging my natural nails?
A: The safest way to remove acrylic nails is to soak them in acetone. File off the top coat of the acrylic, then soak cotton balls in acetone and place them on top of your nails. Wrap your fingertips in foil and let them soak for 20-30 minutes. The acrylic should become soft and easy to remove. Avoid prying or peeling off the acrylic, as this can damage your natural nails.
-
Q: What are the signs I should seek professional help instead of trying to fix the nail myself?
A: If the break is very close to the cuticle, if there is damage to the natural nail (bleeding, bruising), or if you are not comfortable with the repair process, it’s best to seek professional help. Also, if you experience any pain or discomfort, discontinue the repair and consult a nail technician.
-
Q: Can I reuse acrylic powder after it’s been mixed with monomer?
A: No, acrylic powder that has been mixed with monomer should not be reused. Once mixed, the acrylic will begin to harden and will no longer be workable. Always mix only the amount of acrylic you need for each repair.
-
Q: How often should I get my acrylic nails professionally maintained to avoid breaks?
A: It’s generally recommended to get your acrylic nails professionally maintained every 2-3 weeks. This includes getting fills to address the growth of your natural nails and checking for any signs of lifting or damage. Regular maintenance can help prevent breaks and keep your acrylic nails looking their best.
Conclusion: Mastering the Art of At-Home Acrylic Nail Repair
Learning how to fix a broken acrylic nail at home is an empowering skill that provides convenience, cost savings, and a sense of accomplishment. By understanding the different types of breaks, mastering the essential techniques, and practicing proactive care, you can keep your acrylic nails looking flawless. Remember to prioritize the health of your natural nails and always use high-quality products. With a little practice, you’ll be able to confidently handle any acrylic nail emergency and maintain your perfect manicure with ease. Now that you’re equipped with the knowledge and skills, share your experiences with how to fix a broken acrylic nail at home in the comments below. We’d love to hear your tips and tricks!
