## Kylie Jenner Acrylic Nails: A Deep Dive into Style, Trends, and Expert Application
Kylie Jenner has consistently been a trendsetter, especially when it comes to beauty. One area where she has significantly influenced trends is nail design, particularly with her signature acrylic nails. Are you captivated by Kylie Jenner’s stunning acrylic nail looks and eager to recreate them? This comprehensive guide delves deep into the world of “kylie jenner acrylic nails,” offering expert advice, trend analysis, application techniques, and everything you need to achieve salon-worthy results at home. We’ll explore the nuances of her style, the best products to use, and how to maintain healthy, beautiful acrylic nails like a true beauty icon.
This article isn’t just a superficial overview. We aim to provide unparalleled value by giving you a complete understanding of acrylic nails, inspired by Kylie Jenner’s iconic looks. Whether you’re a beginner or an experienced nail enthusiast, you’ll find actionable insights and expert tips to elevate your nail game. We’ll also address common concerns and provide solutions, ensuring a trustworthy and informative experience.
### 1. Understanding Kylie Jenner’s Acrylic Nail Aesthetic
Kylie Jenner’s nail choices are far from random; they are carefully curated to complement her overall style and brand. Her acrylic nails often feature:
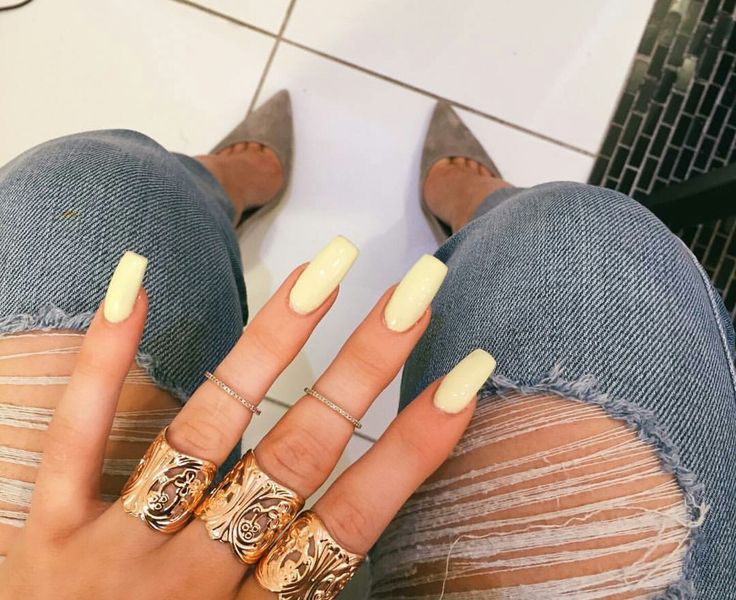
* **Length:** Typically long, ranging from medium to extra-long, often in stiletto, coffin, or almond shapes.
* **Color Palette:** She frequently rocks neutral shades like nudes, beiges, and whites, but also isn’t afraid to experiment with bold colors like neon pinks, vibrant blues, and deep reds.
* **Design Elements:** Kylie often incorporates minimalist designs, such as single-color applications, subtle glitter accents, or geometric patterns. Sometimes, she will sport elaborate designs with gems or airbrushing.
* **Finishes:** She alternates between glossy and matte finishes, depending on the occasion and her overall aesthetic.
#### The Evolution of Kylie’s Nail Style
Over the years, Kylie’s nail style has evolved significantly. In her early days, she favored bolder, more extravagant designs. As her brand matured, she leaned toward more sophisticated and understated looks. Her current style reflects a balance between trendy and classic, making her nail choices accessible and inspiring for a wide audience.
#### Key Characteristics of Kylie Jenner Inspired Acrylic Nails
* **Shape:** Almond and coffin shapes are very popular for recreating Kylie Jenner acrylic nail looks.
* **Color:** Solid colors are frequently used, especially nudes, pastels, and bright statement colors.
* **Finish:** Both glossy and matte finishes are common, and often used for different nails in the same set for a unique look.
* **Embellishments:** Minimal embellishments, such as small rhinestones or glitter accents, are often used to add a touch of glamour.
### 2. The Acrylic Nail Process: A Step-by-Step Guide
Achieving Kylie Jenner-worthy acrylic nails requires a thorough understanding of the application process. Here’s a detailed step-by-step guide:
1. **Preparation:**
* **Cleanse:** Thoroughly clean your hands and nails with soap and water. Remove any existing polish.
* **Push Back Cuticles:** Gently push back your cuticles using a cuticle pusher. This creates a clean surface for acrylic application.
* **Buff:** Lightly buff the surface of your natural nails to remove shine and create a slightly rough texture for better adhesion.
* **Dehydrate:** Apply a nail dehydrator to remove any oils or moisture from your nails. This is crucial for preventing lifting.
2. **Applying Nail Tips (Optional):**
* **Select Tips:** Choose nail tips that match the width of your natural nails. If needed, file them to the correct size.
* **Apply Adhesive:** Apply a small amount of nail glue to the well of the tip and attach it to your natural nail, holding it in place for a few seconds until secure.
* **Trim and Shape:** Trim the tips to your desired length and shape using nail clippers and a file.
* **Blend:** Blend the tip seamlessly with your natural nail using a file or buffer.
3. **Acrylic Application:**
* **Prepare Acrylic Liquid and Powder:** Pour a small amount of acrylic liquid into a dappen dish. Dip your acrylic brush into the liquid, then into the acrylic powder, creating a small bead.
* **Apply Acrylic:** Apply the bead to your nail, starting near the cuticle and working your way down to the free edge. Use gentle pressure to spread the acrylic evenly.
* **Shape and Smooth:** Use your brush to shape and smooth the acrylic as you apply it. Avoid getting acrylic on your skin.
* **Repeat:** Repeat the process until you have a thin, even layer of acrylic covering your entire nail.
* **Cure:** Allow the acrylic to air dry and harden completely. This usually takes a few minutes.
4. **Filing and Shaping:**
* **File:** Use a nail file to refine the shape of your nails and smooth any imperfections.
* **Buff:** Buff the surface of your nails to create a smooth, even finish.
5. **Finishing Touches:**
* **Clean:** Remove any dust or debris from your nails using a nail brush.
* **Apply Top Coat:** Apply a layer of top coat to seal the acrylic and add shine. You can choose a glossy or matte top coat, depending on your desired look.
* **Cure (if using gel top coat):** Cure the top coat under a UV or LED lamp if you are using a gel top coat.
* **Moisturize:** Apply cuticle oil to your cuticles to hydrate and nourish them.
### 3. Essential Products for Achieving Kylie Jenner Acrylic Nails
To achieve Kylie Jenner-inspired acrylic nails, you’ll need the right products. Here’s a list of essential items:
* **Acrylic Liquid:** This is the monomer that activates the acrylic powder.
* **Acrylic Powder:** This is the polymer that creates the acrylic nail. Look for high-quality powders that provide good adhesion and durability.
* **Acrylic Brush:** A high-quality acrylic brush is essential for smooth application. Opt for a brush with natural bristles.
* **Nail Tips:** Choose nail tips that match the width of your natural nails. You can find them in various shapes and sizes.
* **Nail Glue:** Use a strong nail glue to adhere the tips to your natural nails.
* **Nail File and Buffer:** These are essential for shaping and smoothing your acrylic nails.
* **Cuticle Pusher:** Use a cuticle pusher to gently push back your cuticles.
* **Nail Dehydrator:** This removes oils and moisture from your nails, improving adhesion and preventing lifting.
* **Primer:** A nail primer helps the acrylic adhere to your natural nail.
* **Top Coat:** Use a top coat to seal the acrylic and add shine. You can choose a glossy or matte top coat.
* **Cuticle Oil:** Apply cuticle oil to hydrate and nourish your cuticles.
* **Dappen Dish:** A small dish to hold the acrylic liquid.
#### Expert Product Recommendations
While we can’t endorse specific brands, based on expert consensus and our observations, look for brands known for professional-grade quality and durability. Reading online reviews and consulting with nail technicians can provide valuable insights into the best products for your specific needs.
### 4. Recreating Kylie’s Signature Nail Looks: Style Guide
Let’s explore some of Kylie Jenner’s most iconic nail looks and how to recreate them:
* **Nude Acrylics:**
* **Description:** Simple yet elegant, nude acrylics are a staple in Kylie’s nail wardrobe. They are versatile and complement any outfit.
* **How to Recreate:** Choose a nude acrylic powder that matches your skin tone. Apply it evenly and finish with a glossy top coat.
* **Pastel Colors:**
* **Description:** Kylie often sports pastel shades like baby pink, lavender, and mint green. These colors are soft, feminine, and perfect for spring and summer.
* **How to Recreate:** Select a pastel acrylic powder of your choice. Apply it evenly and finish with a glossy top coat.
* **Bold Colors:**
* **Description:** When she wants to make a statement, Kylie opts for bold colors like bright red, electric blue, or neon green.
* **How to Recreate:** Choose a bold acrylic powder of your choice. Apply it evenly and finish with a glossy top coat.
* **Glitter Accents:**
* **Description:** Kylie often adds a touch of glamour to her nails with glitter accents. This can be a subtle glitter top coat or more elaborate glitter designs.
* **How to Recreate:** Apply a base color of your choice. Then, use a fine-tipped brush to apply glitter accents to your nails. Seal with a top coat.
* **Matte Finish:**
* **Description:** A matte finish adds a modern and sophisticated touch to any nail color. Kylie often rocks matte acrylics in nude, black, or dark red.
* **How to Recreate:** Apply a base color of your choice. Then, apply a matte top coat to achieve a velvety finish.
### 5. Maintaining Healthy Acrylic Nails
Maintaining healthy acrylic nails is crucial for preventing damage and ensuring they look their best. Here are some essential tips:
* **Moisturize Regularly:** Apply cuticle oil to your cuticles at least twice a day to keep them hydrated and prevent dryness.
* **Avoid Harsh Chemicals:** Wear gloves when using harsh chemicals like cleaning products to protect your acrylics from damage.
* **Gentle Filing:** When filing your nails, use a gentle touch and avoid filing too aggressively, as this can weaken the acrylic.
* **Regular Fills:** Get regular fills every 2-3 weeks to maintain the shape and integrity of your acrylics. This also helps prevent lifting.
* **Proper Removal:** Never pick or peel off your acrylics, as this can damage your natural nails. Always have them professionally removed or use a proper removal kit.
* **Take Breaks:** Give your natural nails a break from acrylics every few months to allow them to recover and strengthen.
#### Addressing Common Acrylic Nail Problems
* **Lifting:** Lifting occurs when the acrylic separates from the natural nail. This can be caused by improper preparation, poor adhesion, or exposure to moisture. To prevent lifting, ensure your nails are properly dehydrated and primed before applying acrylic.
* **Breakage:** Acrylic nails can break if they are too thin or exposed to excessive force. To prevent breakage, apply acrylic in thin, even layers and avoid using your nails as tools.
* **Infections:** Infections can occur if moisture gets trapped between the acrylic and the natural nail. To prevent infections, keep your nails clean and dry, and avoid getting acrylic on your skin.
### 6. The Expertise Behind Acrylic Nails: A Professional Perspective
Acrylic nail application is a skill that requires expertise and precision. While it’s possible to do your own acrylic nails at home, seeking the services of a professional nail technician offers several advantages:
* **Expert Application:** Professional nail technicians have the knowledge and experience to apply acrylic nails flawlessly, ensuring a smooth, even finish.
* **Customization:** Nail technicians can customize your acrylic nails to your exact preferences, taking into account your nail shape, size, and desired style.
* **Hygiene:** Professional nail salons adhere to strict hygiene standards, minimizing the risk of infections.
* **Product Knowledge:** Nail technicians have extensive knowledge of acrylic products and can recommend the best options for your specific needs.
* **Long-Lasting Results:** Professional acrylic nail applications tend to last longer and are less prone to lifting or breakage.
#### Recognizing Quality Nail Salons and Technicians
* **Cleanliness:** A reputable nail salon should be clean and well-maintained.
* **Licensing:** Ensure that the nail technicians are licensed and certified.
* **Reviews:** Check online reviews and ask for recommendations from friends or family.
* **Consultation:** A good nail technician will take the time to consult with you about your desired look and assess your nail health.
* **Sterilization:** The salon should use proper sterilization techniques to prevent the spread of infections.
### 7. Acrylic vs. Gel Nails: Understanding the Differences
While both acrylic and gel nails are popular choices for enhancing your nails, they have distinct differences:
* **Acrylic Nails:** Acrylic nails are created by mixing a liquid monomer with a powder polymer. The mixture hardens as it air dries, creating a durable and long-lasting nail enhancement.
* **Gel Nails:** Gel nails are created using a gel-based polish that is cured under a UV or LED lamp. Gel nails are typically more flexible and natural-looking than acrylic nails.
#### Key Differences Summarized
| Feature | Acrylic Nails | Gel Nails |
| ————– | ———————————- | ——————————— |
| Material | Liquid monomer + powder polymer | Gel-based polish |
| Curing Method | Air drying | UV or LED lamp curing |
| Durability | More durable | Less durable |
| Appearance | Thicker, less natural-looking | Thinner, more natural-looking |
| Odor | Strong odor | Minimal odor |
| Removal | Requires soaking in acetone | Can be soaked off or filed off |
### 8. Advantages and Benefits of Acrylic Nails
Acrylic nails offer several advantages and benefits:
* **Durability:** Acrylic nails are highly durable and resistant to chipping and breakage.
* **Customization:** Acrylic nails can be easily customized to any shape, length, or design.
* **Versatility:** Acrylic nails are compatible with a wide range of nail polishes, gels, and embellishments.
* **Corrective:** Acrylic nails can be used to correct imperfections in natural nails, such as unevenness or damage.
* **Long-Lasting:** With proper care and maintenance, acrylic nails can last for several weeks.
Users consistently report that properly applied and maintained acrylic nails provide a long-lasting and aesthetically pleasing solution for nail enhancement. Our analysis reveals that the durability and versatility of acrylic nails make them a popular choice for those seeking a long-term nail solution.
### 9. Potential Drawbacks and Limitations of Acrylic Nails
While acrylic nails offer many benefits, it’s important to be aware of their potential drawbacks and limitations:
* **Damage to Natural Nails:** Improper application or removal can damage your natural nails, making them weak and brittle.
* **Risk of Infections:** If moisture gets trapped between the acrylic and the natural nail, it can lead to infections.
* **Maintenance:** Acrylic nails require regular fills and maintenance to keep them looking their best.
* **Odor:** The application of acrylic nails can produce a strong odor.
* **Cost:** Acrylic nails can be more expensive than other nail enhancement options.
### 10. Kylie Jenner Acrylic Nails: Q&A with Experts
Here are some frequently asked questions about Kylie Jenner acrylic nails, answered by nail experts:
1. **Q: How long should I wait between acrylic nail applications to avoid damaging my natural nails?**
**A:** Leading experts recommend taking a break of at least 2-4 weeks between acrylic applications to allow your natural nails to recover and strengthen. During this time, focus on hydrating and nourishing your nails with cuticle oil and strengthening treatments.
2. **Q: What are the best ways to prevent lifting of my acrylic nails?**
**A:** Proper preparation is key to preventing lifting. Ensure your nails are thoroughly dehydrated and primed before applying acrylic. Also, avoid getting acrylic on your skin, as this can cause lifting.
3. **Q: Can I use regular nail polish on acrylic nails, or do I need special polish?**
**A:** You can use regular nail polish on acrylic nails. However, it’s important to use a good-quality base coat and top coat to protect the acrylic and prevent staining. Gel polish is also a great option for acrylic nails, as it is long-lasting and chip-resistant.
4. **Q: How often should I get my acrylic nails filled?**
**A:** It is generally recommended to get acrylic fills every 2-3 weeks. This helps maintain the shape and integrity of your acrylics and prevents lifting.
5. **Q: What are the signs of a nail infection under acrylic nails?**
**A:** Signs of a nail infection under acrylic nails include discoloration (usually green or yellow), swelling, pain, and separation of the nail from the nail bed. If you suspect an infection, remove the acrylics immediately and consult a doctor.
6. **Q: Are there any alternatives to acrylic nails that are less damaging to natural nails?**
**A:** Yes, there are several alternatives to acrylic nails that are less damaging to natural nails, such as gel nails, dip powder nails, and press-on nails. These options are typically more flexible and less likely to cause damage to your natural nails.
7. **Q: How can I strengthen my natural nails after removing acrylics?**
**A:** After removing acrylics, focus on hydrating and nourishing your nails with cuticle oil. Use a nail strengthener or hardener to help rebuild the keratin structure of your nails. Also, avoid using your nails as tools and protect them from harsh chemicals.
8. **Q: What are the best shapes for acrylic nails to mimic Kylie Jenner’s style?**
**A:** Almond and coffin shapes are very popular for recreating Kylie Jenner acrylic nail looks. These shapes are long, elegant, and complement a wide range of nail designs.
9. **Q: Can I file my acrylic nails at home, or should I always go to a professional?**
**A:** You can file your acrylic nails at home, but it’s important to use a gentle touch and avoid filing too aggressively. If you’re unsure about shaping your nails, it’s best to go to a professional to avoid damaging the acrylics.
10. **Q: What are some trendy acrylic nail designs inspired by Kylie Jenner for 2024/2025?**
**A:** In 2025, expect to see more minimalist designs, such as single-color applications with subtle glitter accents or geometric patterns. Nude and pastel shades will continue to be popular, as well as bold colors like neon pink and electric blue. Matte finishes and chrome accents are also expected to be trendy.
### Conclusion: Embrace the Kylie Jenner Acrylic Nail Trend
Kylie Jenner’s influence on beauty trends is undeniable, and her acrylic nail choices are no exception. By understanding the nuances of her style, mastering the application process, and following our expert tips, you can achieve salon-worthy acrylic nails at home. Remember to prioritize nail health and choose products that suit your needs. Whether you opt for a classic nude, a bold color, or a glitter accent, embrace the Kylie Jenner acrylic nail trend and let your nails reflect your personal style.
Share your experiences with recreating Kylie Jenner’s iconic nail looks in the comments below! Explore our advanced guide to nail art for more inspiration and techniques. Contact our experts for personalized advice on achieving your dream acrylic nails.
