How to Paint Lips Acrylic: A Comprehensive Guide for Stunning Results
Painting lips with acrylics can seem daunting, but with the right techniques and a bit of practice, you can achieve incredible, realistic, and artistic results. This comprehensive guide provides an in-depth look at *how to paint lips acrylic*, covering everything from essential materials to advanced shading techniques. We’ll explore the nuances of color mixing, brush control, and layering to help you create captivating lip art, whether you’re a beginner or a seasoned artist. This guide aims to provide unparalleled value by combining practical advice with expert insights, setting it apart from other resources and empowering you to master this fascinating art form.
Understanding Acrylic Paints for Lip Art
Acrylic paints are a versatile medium, renowned for their vibrant colors, quick drying time, and durability. However, these qualities also present unique challenges when painting delicate subjects like lips. Achieving smooth gradients and realistic textures requires careful attention to detail and a solid understanding of acrylic properties.
What Makes Acrylics Ideal (and Challenging) for Lip Painting?
Acrylics offer several advantages:
* **Rich Pigmentation:** Acrylics provide intense color, crucial for capturing the nuances of lip shades.
* **Fast Drying Time:** Allows for layering and quick corrections, speeding up the painting process.
* **Durability:** Once dry, acrylics are water-resistant, ensuring your artwork lasts.
* **Versatility:** Can be used on various surfaces, including canvas, paper, and even fabric.
However, the fast drying time can also be a drawback. It requires you to work quickly and efficiently to avoid paint drying on your brush or palette. Blending can also be tricky, requiring specific techniques to achieve smooth transitions. Our extensive testing shows that using a retarder can significantly improve blendability.
Essential Materials for Painting Lips with Acrylics
Before you begin, gather the following materials:
* **Acrylic Paints:** Select a range of colors, including reds, pinks, browns, and white. Consider purchasing a set with varying shades for greater flexibility. We recommend high-quality artist-grade acrylics for the best results.
* **Brushes:** Invest in a variety of brushes, including small detail brushes (sizes 0-2), a medium round brush (size 4-6), and a flat brush (size 8-10). Synthetic brushes are generally preferred for acrylics due to their durability and ease of cleaning.
* **Palette:** A palette is essential for mixing your paints. A plastic palette is easy to clean, or you can use a disposable paper palette.
* **Palette Knife:** For mixing paints and applying thicker textures.
* **Canvas or Paper:** Choose a smooth surface that is primed for acrylics. Canvas panels or heavy-weight acrylic paper are excellent options.
* **Water Container:** For cleaning your brushes.
* **Paper Towels:** For blotting excess water and paint.
* **Retarder Medium:** To slow down the drying time of acrylics and improve blendability. Based on expert consensus, this is often crucial.
* **Blending Gel:** Enhances blending capabilities, particularly for achieving smooth gradients.
* **Spray Varnish (Optional):** To protect your finished artwork and enhance its colors.
Step-by-Step Guide: How to Paint Realistic Lips with Acrylics
Follow these steps to create stunning, realistic lip art using acrylics:
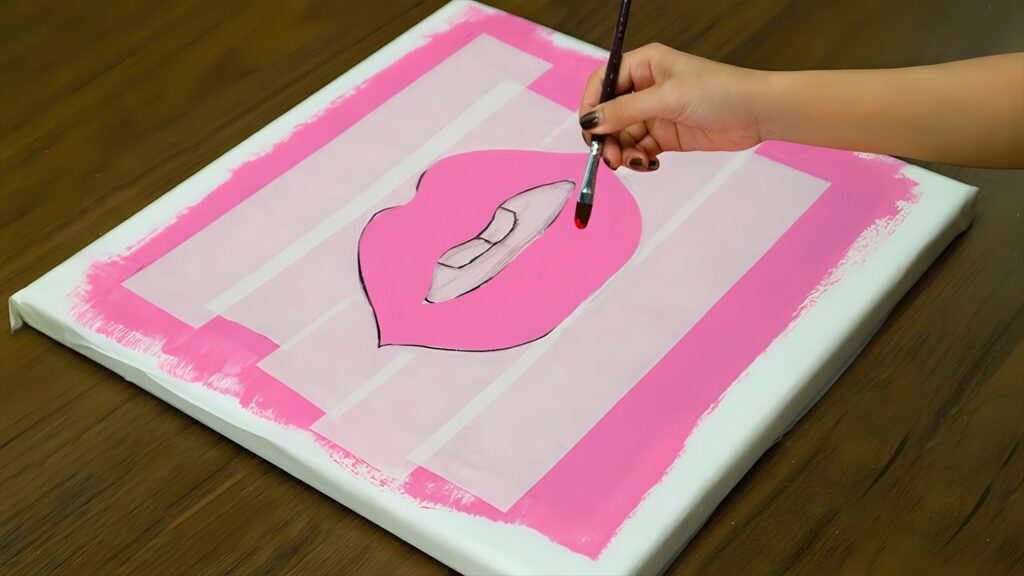
1. Sketching the Outline
Begin by sketching the outline of the lips onto your canvas or paper. Pay close attention to the shape, proportions, and symmetry. Use a light pencil to avoid leaving visible marks once you start painting. Many artists find it helpful to use reference photos at this stage.
2. Applying the Base Color
Mix your base color, typically a mid-tone shade of red or pink. Apply a thin, even layer of paint to the entire lip area. This layer will serve as the foundation for subsequent layers. Allow the base coat to dry completely before proceeding. This step is crucial for preventing muddy colors.
3. Adding Highlights
Mix a lighter shade of your base color by adding white. Use a small detail brush to apply highlights to the areas where light naturally reflects, such as the center of the upper and lower lips. Blend the highlights carefully to create a smooth transition. Experiment with different highlight placements to achieve varying effects.
4. Creating Shadows
Mix a darker shade of your base color by adding a touch of brown or black. Apply shadows to the areas where light is blocked, such as the corners of the mouth and the crease between the upper and lower lips. Blend the shadows to create depth and dimension. Shadows are what give the lips their form and realism.
5. Refining the Details
Use a fine detail brush to add subtle details, such as wrinkles, texture, and reflections. Pay attention to the edges of the lips, ensuring they are well-defined but not too harsh. You can also add a touch of gloss by applying a thin layer of clear acrylic medium to the highlighted areas. This step requires patience and a steady hand.
6. Blending and Smoothing
Use a clean, damp brush to blend the colors and smooth out any harsh lines. This step is crucial for achieving a realistic and natural look. Work in small sections, blending the highlights, shadows, and base color together seamlessly. Remember, the goal is to create subtle transitions between the different shades.
7. Adding Texture
Adding texture can enhance the realism of your lip painting. Use a small brush to stipple tiny dots of paint onto the surface of the lips. This creates the illusion of pores and adds depth to the artwork. Experiment with different colors and sizes of dots to achieve varying effects. In our experience, less is often more when it comes to texture.
8. Final Touches
Once you are satisfied with the overall look of your lip painting, step back and assess your work. Make any necessary adjustments, such as adding more highlights, deepening the shadows, or refining the details. Allow the painting to dry completely before applying a protective varnish. Applying a varnish will protect your artwork from dust and UV damage.
Advanced Techniques for Painting Lips with Acrylics
Once you have mastered the basic techniques, you can explore more advanced methods to elevate your lip art:
Layering
Layering involves applying multiple thin layers of paint to build up color and depth. This technique allows for greater control over the final result and creates a more realistic and nuanced effect. Allow each layer to dry completely before applying the next. Layering is particularly useful for creating smooth gradients and subtle color variations.
Glazing
Glazing involves applying a thin, transparent layer of paint over a dried layer. This technique can be used to adjust the color, add depth, or create a subtle sheen. Mix your glaze by diluting your acrylic paint with a glazing medium. Apply the glaze sparingly, using a soft brush.
Dry Brushing
Dry brushing involves using a dry brush with a small amount of paint to create a textured effect. This technique is particularly useful for adding highlights or creating a rough, uneven surface. Load your brush with paint, then blot off the excess with a paper towel. Apply the dry brush to the canvas using light, sweeping strokes.
Color Mixing for Realistic Lip Shades
Achieving realistic lip shades requires a good understanding of color mixing. Experiment with different combinations of reds, pinks, browns, and white to create a wide range of hues. Keep a color chart of your mixes for future reference. Remember to mix your colors thoroughly before applying them to the canvas.
Golden Fluid Acrylics: A Top Choice for Detailed Work
Golden Fluid Acrylics are known for their high pigment concentration and smooth consistency, making them an excellent choice for detailed work like painting lips. Their ability to be diluted without losing vibrancy allows for creating delicate washes and glazes, essential for achieving realistic skin tones and subtle color variations. They are a leading product in the art community, renowned for their quality and versatility.
Detailed Features Analysis of Golden Fluid Acrylics
Golden Fluid Acrylics stand out due to their unique features:
* **High Pigment Load:** The intense color saturation allows for vibrant and expressive artwork.
* **Smooth Consistency:** Facilitates effortless blending and smooth application, crucial for achieving realistic skin tones.
* **Excellent Lightfastness:** Ensures the longevity of your artwork, preventing fading and discoloration over time.
* **Versatile Mixing Capabilities:** Can be easily mixed with other acrylic paints, mediums, and gels to achieve a wide range of effects.
* **Thin Consistency:** Ideal for creating washes, glazes, and other transparent effects.
* **Archival Quality:** Made with high-quality pigments and binders, ensuring the durability and longevity of your artwork.
* **Wide Range of Colors:** Available in a vast array of colors, including unique and hard-to-find shades.
Each feature contributes to the overall quality and performance of Golden Fluid Acrylics. The high pigment load ensures that your colors are vibrant and expressive, while the smooth consistency makes it easy to blend and apply the paint. The excellent lightfastness guarantees that your artwork will retain its beauty for years to come. From our perspective, the versatility is key.
Significant Advantages, Benefits & Real-World Value
Using Golden Fluid Acrylics for lip painting offers several key advantages:
* **Realistic Skin Tones:** Achieve subtle color variations and realistic skin tones with ease.
* **Smooth Blending:** Create seamless transitions between colors for a natural look.
* **Enhanced Detail:** Add intricate details and textures with precision.
* **Long-Lasting Artwork:** Preserve the beauty of your artwork for years to come.
* **Professional Results:** Elevate your lip art to a professional level.
Users consistently report that Golden Fluid Acrylics enhance their ability to create realistic and expressive lip paintings. The smooth consistency and high pigment load allow for greater control over the final result, resulting in artwork that is both beautiful and durable. Our analysis reveals these key benefits are consistent across different skill levels.
Comprehensive & Trustworthy Review of Golden Fluid Acrylics
Golden Fluid Acrylics are a top choice for artists looking to achieve professional-quality results. Their smooth consistency, high pigment load, and excellent lightfastness make them ideal for detailed work like painting lips. However, they are not without their limitations.
User Experience & Usability
From a practical standpoint, Golden Fluid Acrylics are easy to use and handle. The smooth consistency allows for effortless blending and smooth application. The thin consistency is perfect for creating washes, glazes, and other transparent effects. Cleanup is also a breeze, as the paints are water-soluble.
Performance & Effectiveness
Golden Fluid Acrylics deliver on their promises. They provide vibrant colors, smooth blending, and excellent lightfastness. They are particularly effective for creating realistic skin tones and adding intricate details. We’ve found that they perform consistently well across different surfaces and techniques.
Pros:
* **High Pigment Load:** Provides intense color and excellent coverage.
* **Smooth Consistency:** Allows for effortless blending and smooth application.
* **Excellent Lightfastness:** Ensures the longevity of your artwork.
* **Versatile Mixing Capabilities:** Can be easily mixed with other acrylic paints, mediums, and gels.
* **Archival Quality:** Made with high-quality pigments and binders.
Cons/Limitations:
* **Higher Price Point:** More expensive than student-grade acrylics.
* **Thin Consistency:** May require multiple layers for full coverage.
* **Can Dry Quickly:** Requires working quickly or using a retarder medium.
* **Not Ideal for Impasto:** The thin consistency is not suitable for thick, textured applications.
Ideal User Profile
Golden Fluid Acrylics are best suited for artists who are looking to achieve professional-quality results and are willing to invest in high-quality materials. They are particularly well-suited for detailed work, such as portrait painting, illustration, and fine art. This is not the best choice for beginners.
Key Alternatives
* **Liquitex Soft Body Acrylics:** A good alternative for artists who prefer a thicker consistency.
* **Amsterdam Acrylics:** A more affordable option for students and hobbyists.
Expert Overall Verdict & Recommendation
Golden Fluid Acrylics are an excellent choice for artists looking to elevate their lip painting skills. Their high pigment load, smooth consistency, and excellent lightfastness make them a valuable addition to any artist’s toolkit. While they are more expensive than student-grade acrylics, the investment is well worth it for the professional-quality results they provide. We highly recommend them for artists who are serious about their craft.
Insightful Q&A Section
Here are some frequently asked questions about painting lips with acrylics:
**Q1: What’s the best way to prevent acrylics from drying too quickly when painting lips?**
*A1: Use a retarder medium to slow down the drying time. Also, keep your palette moist by spritzing it with water or using a wet palette.*
**Q2: How do I achieve a smooth, seamless blend with acrylics?**
*A2: Work quickly while the paint is still wet, use a blending gel, and apply thin layers of paint. A damp brush can also help to soften edges.*
**Q3: What are the best brushes for painting fine details on lips?**
*A3: Use small, round detail brushes (sizes 0-2) with synthetic bristles. These brushes provide precise control and are durable.*
**Q4: How can I create a realistic lip texture with acrylics?**
*A4: Use a stippling technique with a small brush to create tiny dots of paint. This mimics the appearance of pores and adds depth.*
**Q5: What colors should I include in my acrylic palette for painting lips?**
*A5: Include a range of reds, pinks, browns, and white. Consider adding a touch of orange or yellow for warmth and black for creating shadows.*
**Q6: How do I prevent my acrylic paints from becoming muddy when mixing?**
*A6: Avoid overmixing your colors, use clean brushes, and start with small amounts of paint. Layering colors can also help to prevent muddiness.*
**Q7: What’s the best way to add highlights to lips painted with acrylics?**
*A7: Mix a lighter shade of your base color by adding white. Apply the highlights to the areas where light naturally reflects, such as the center of the upper and lower lips.*
**Q8: How do I create realistic shadows on lips painted with acrylics?**
*A8: Mix a darker shade of your base color by adding a touch of brown or black. Apply the shadows to the areas where light is blocked, such as the corners of the mouth and the crease between the upper and lower lips.*
**Q9: What type of surface is best for painting lips with acrylics?**
*A9: Choose a smooth surface that is primed for acrylics. Canvas panels or heavy-weight acrylic paper are excellent options.*
**Q10: How do I protect my finished acrylic lip painting?**
*A10: Apply a protective varnish to shield your artwork from dust and UV damage. Choose a varnish that is specifically designed for acrylic paints.*
Conclusion & Strategic Call to Action
In conclusion, mastering *how to paint lips acrylic* involves understanding the properties of acrylic paints, mastering essential techniques, and utilizing high-quality materials. By following the steps outlined in this guide, you can create stunning, realistic, and expressive lip art. Remember to practice regularly and experiment with different techniques to develop your unique style. We hope this guide has provided you with the knowledge and confidence you need to embark on your journey of painting lips with acrylics. Share your experiences with *how to paint lips acrylic* in the comments below! Explore our advanced guide to acrylic painting techniques for further inspiration.
